► Japanese
JUDO2 User Guide
JUDO2 can display observed images, instrumental fields of view, and positions of the cataloged objects on the celestial sphere.
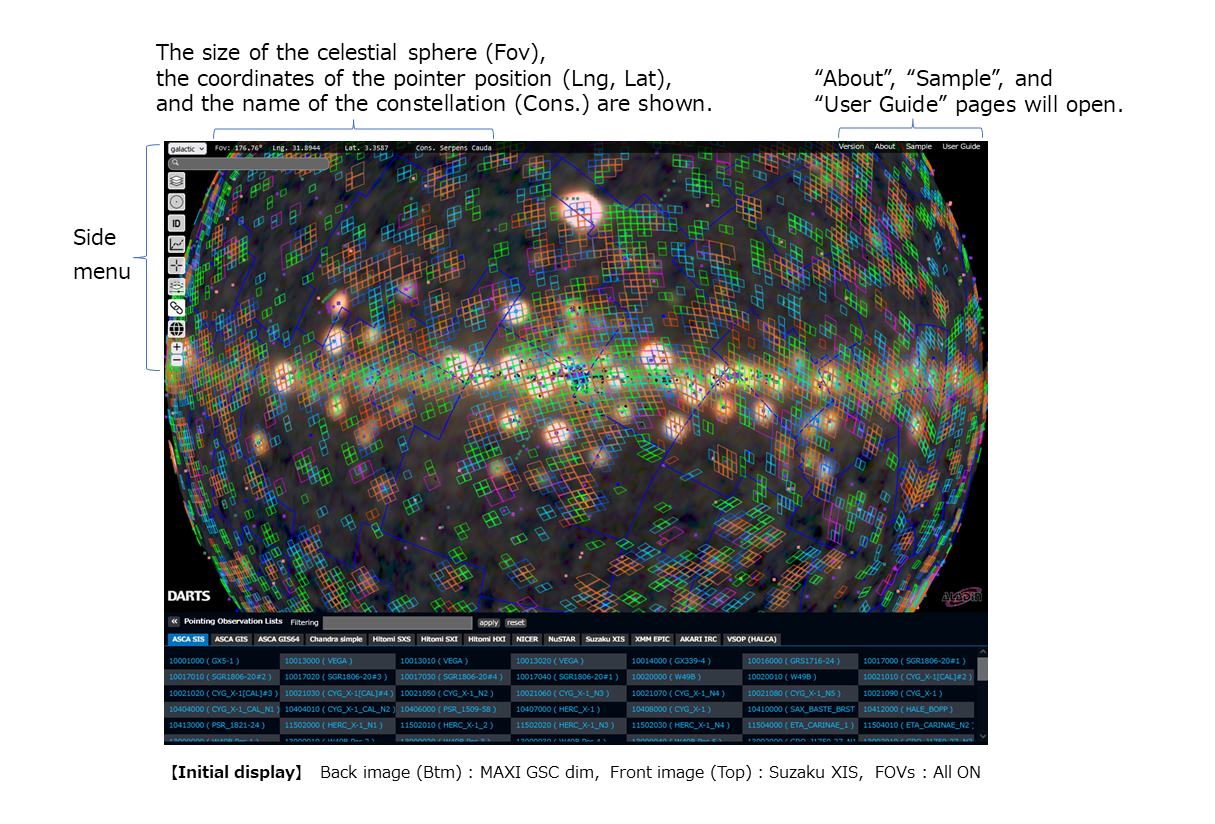
- The screen display can be changed from the side menu.
- At the bottom of the screen, Pointing Observation Lists are displayed.
Side menu
 : Selects the coordinate system to display
Selects galactic coordinates or equatorial coordinates.
 : Search for a celestial object
Enter coordinates (ex. 187.705 12.391) or object name (ex. M87), then the screen will be centered on this position.
* Mini-window will open when clicking each of the following icons in the side-menu, and close when the same icon is clicked again.
 Images to display : Selecting the Bottom image and the Top image to be overlaid on it.
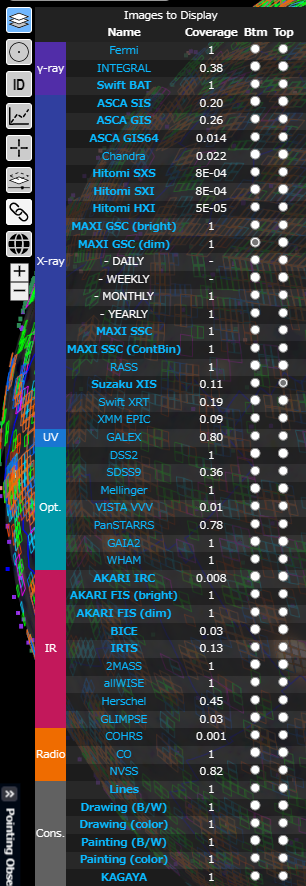
The list of image data is arranged in order of shortest wavelength (from γ-ray to radio). The "Cons." group at the bottom is not observational data, but images of constellations.
Select the back (Btm) and front (Top) data, the images will be superimposed. If you select the same data for both, you will see only that image. Coverage=1 means all-sky observation data, so if you select data with coverage=1 for the front (Top), the back image (Btm) will be hidden.
MAXI - DAYLY, WEEKLY, MONTHLY, YEARLY are time series data which you can see how the data changes over time. If you select one of them, Time Series Control window will open. Two Time Series Data cannot be selected at the same time.
| [Name] | The mission name or the name of the mission and instruments. |
|---|---|
| [Coverage] | The coverage of the entire sky is indicated by a number between 0 and 1, where 1 indicates an all-sky observation and less than 1 indicates a partial observation. The smaller the instrument's field of view or observation area, the closer the value is to 0. |
| [Btm, Top] | Select the image data to be displayed in Btm(back) and Top(front). The initial display is set to Btm=MAXI, Top=Suzaku. |
 FOVs to display : Display of observation field of views
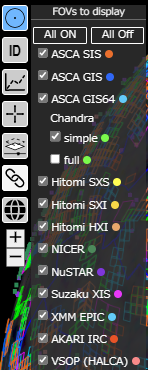
A list of pointing observation data is lined up.
The field of view of the selected observation data is displayed on the celestial sphere.
As for Chandra, you can select either simple (only the center position of the observation) or full (the exact field of view of the instrument) to display. It may take some time to display the full field of view.
A list of data with the observation field of view displayed on the celestial sphere will appear in Pointing Observation Lists at the bottom of the screen.
 Catalogs to display : Display of celestial object catalogs
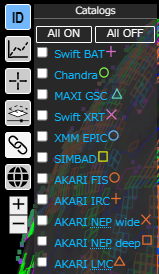
A list of the celestial object catalogs is lined up.
The positions of the objects registered in the selected catalog are marked on the celestial sphere. Information such as object name, coordinates, and flux will appear by clicking on the displayed mark.
 Products to display : Display of celestial objects with products
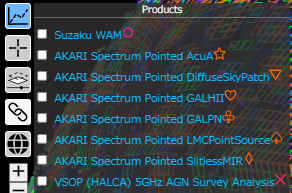
A list of data with publicly available scientific products (light curves, spectra, analysis results, etc.) is lined up.
The positions of the objects in the selected data are marked on the celestial sphere. A link to the public URL of the product for that object will appear by clicking on the displayed mark.
 Options : Specifying display options
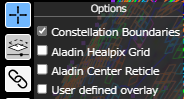
| [Constellation Boundaries] | The constellation boundary line is displayed as a blue line. |
|---|---|
| [Aladin Healpix Grid] | The Healpix grid is displayed. |
| [Aladin Center Reticle] | The central position on the screen is indicated by a + mark. |
| [User defined overlay] | A user-specified shape such as ○ , □ is displayed. (Currently there is a bug, and it is under adjustment.) |
 Transparency : Adjusting transparency of images and display
You can adjust transparency by sliding the knob.
| [Top Image] | The transparency of the front image (Top) is adjusted. If you set it to the leftmost position, only the back image (Btm) will be visible. |
|---|---|
| [Graphic] | The transparency of observation field of views (see FOVs to display), marks of celestial objects (see Catalogs to display, Products to display), and constellation boundaries (see Options) is adjusted. When you set the knob to the leftmost position, only the data images will be visible. |
 Links : Getting links
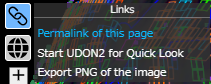
| [Permalink of this page] | When you click this, the URL (permanent link) that reproduce the current screen view is displayed in the address bar of the browser. |
|---|---|
| [Start UDON2 for Quick Look] | When MAXI images are selected in [Images to display], or, Hitomi, Suzaku, ASCA FOVs are selected in [FOVs to display], clicking this will show a list of celestial objects displayed on the celestial sphere. Clicking the name of an object in the list will open MAXI on-demand process page at RIKEN in the case of MAXI, or UDON2 quick analysis tool page at DARTS in the case of other data. |
| [Export PNG of the image] | Clicking this opens a PNG image of the current display screen in a new window. |
 External Services : Launching external search services
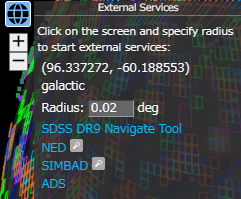
You can search and display cataloged objects using an external search site by specifying a position and a radius.
You can check if a source in a field of view can be identified as a cataloged source, and get information about the source.
Search Procedure
- With the mini-window open, click anywhere on the displayed image. The coordinates will be displayed on the third line (*, *) in the mini-window.
- Specify a radius in [Radius] to search.
- Clicking on [SDSS], [NED], [SIMBAD], or [ADS] will open a page of search results at each site with the specified criteria.
Display of cataloged objects on the screen
As for [NED] and [SIMBAD], clicking  will display positions of cataloged objects detected by search with yellow marks on the screen.
Clicking a mark opens an information page for that cataloged object.
will display positions of cataloged objects detected by search with yellow marks on the screen.
Clicking a mark opens an information page for that cataloged object.
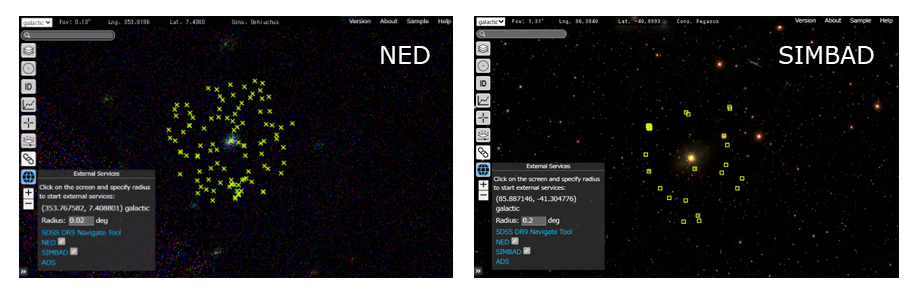
- Before you start, zoom in the celestial sphere image with + of +/- and set "Fov:" value displayed in the upper left corner to about ∼ 0.2 for NED, ∼ 2.0 for SIMBAD. If the view is zoomed-out, positions of the searched objects will overlap.
- Set "Radius" to ∼0.05 deg for NED, ∼0.5 deg for SIMBAD. If the radius is too large, the retrieved data is too large and it may take a long time to display or cannot be displayed.
- NED and SIMBAD results cannot be displayed at the same time.
Display at the bottom of the screen
Clicking ≪ will hide the data list. To open it, click ≫ .
 Pointing Observation Lists : Display of data lists
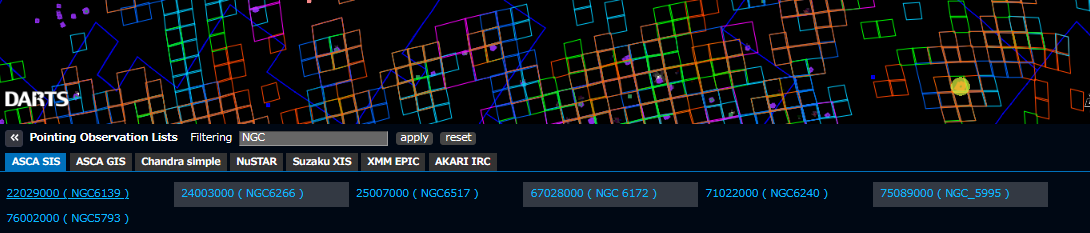
Data lists with the observation field of views (see FOVs to display) on the celestial sphere are displayed in the format "Observation ID (Object name)".
When you hover the cursor over the "Observation ID (Object Name)", the observation area is indicated by a yellow circle ● on the celestial sphere.
Clicking on the "Observation ID (Object Name)" will open the information page of the observation data.
| [Filtering] | Enter "NGC" in the input window and click the [apply] button to display only the observations that include "NGC" in the object name. |
|---|---|
| [reset] | Click the button to reset the condition. |
Examples
Clicking the image will open JUDO2 in the setting configuration.
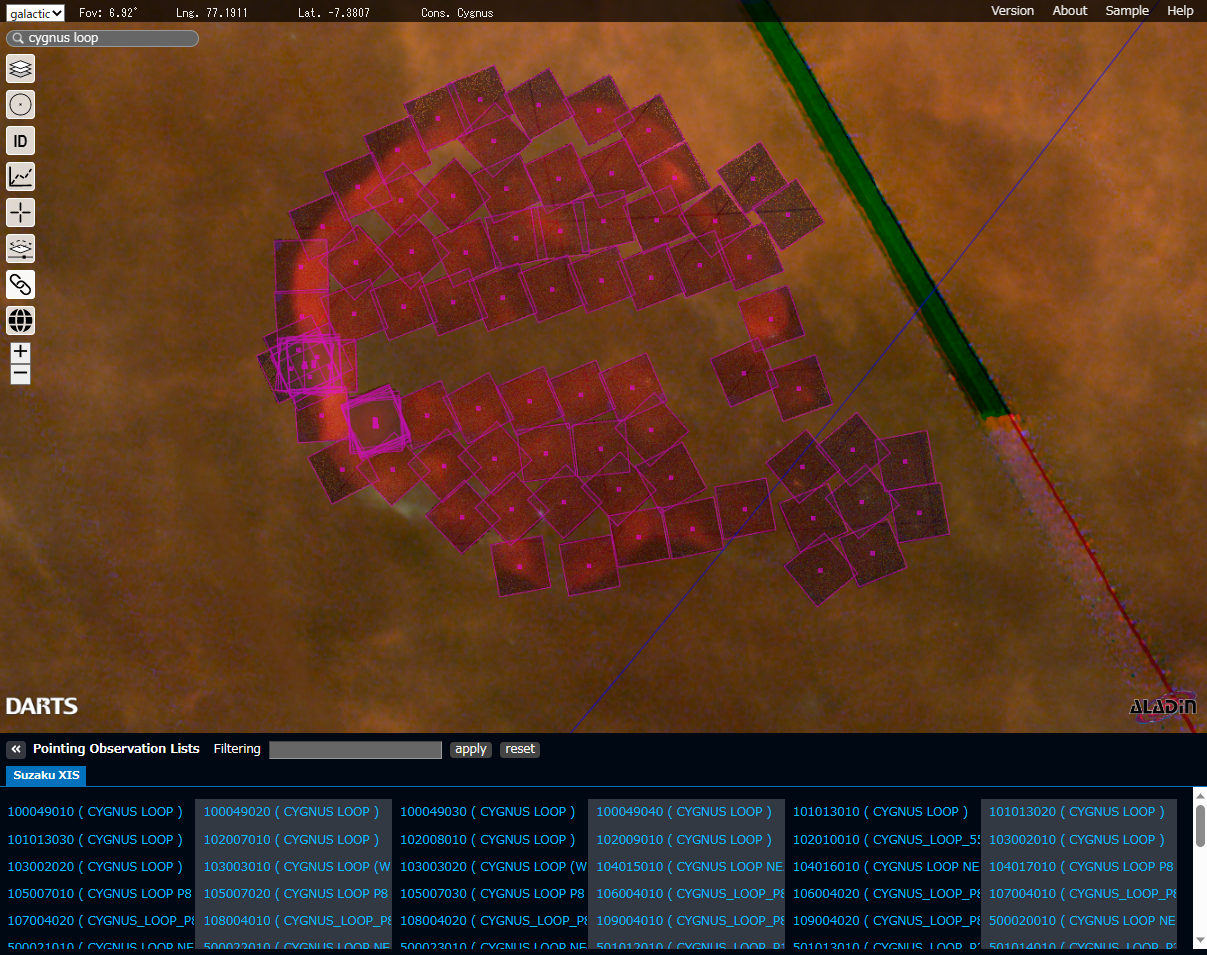
| Position : | Cygnus loop |
|---|---|
| Images : | Top=Suzaku XIS Btm=AKARI FIS (bright) |
| FOVs : | Suzaku XIS only |
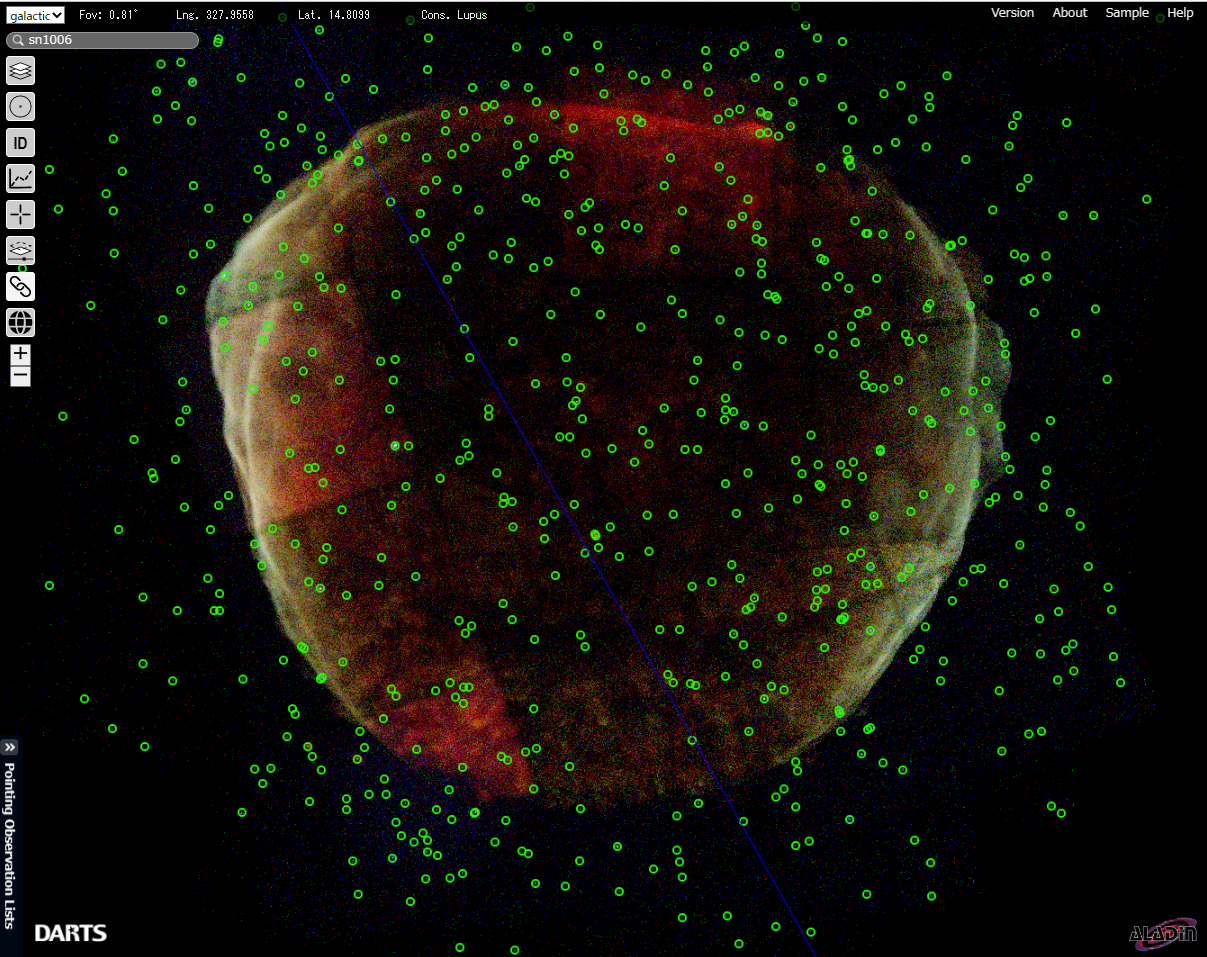
| Position : | SN1006 |
|---|---|
| Images : | Top=Chandra Btm=Chandra |
| FOVs : | All OFF |
| Catalogs : | Chandra only |
Notes
If the screen does not display properly or takes too long, zooming in and out or reloading the page may fix the problem.
Visit "Samples" page for more examples.
If you have any questions or comments, please email us at "darts-admin AT ML.isas.jaxa.jp".